This page was generated from /home/docs/checkouts/readthedocs.org/user_builds/blm/checkouts/latest/docs/tutorials/tutorial-2-advance-plotting.ipynb.
Interactive online version:
![]() Slideshow:
Slideshow:
![]()
4.2. Advanced plotting in Python
Here you will learn more advance skills for plotting in Python:
How to have multiple plots in one figure (subplots)?
How to handle different axis in one figure?
How to position legend?
How to change x and y ticks?
Loading necessary packages
[1]:
import numpy as np
import matplotlib.pyplot as plt
We want to have a figure with two horizontal subplots:
[2]:
fig,axs=plt.subplots(1,2,figsize=(15,3))

The above figures have two axis (left and right one). You can see this by printing the contents of axs:
[3]:
print(axs)
[<matplotlib.axes._subplots.AxesSubplot object at 0x115cbdc18>
 <matplotlib.axes._subplots.AxesSubplot object at 0x115d85b38>]
so let’s create some data to plot:
[4]:
x=np.arange(0,10,.1)
y1=np.sin(x)
y2=np.cos(x)
Let’s plot them on the figure:
[5]:
fig,axs=plt.subplots(1,2,figsize=(15,3))

ax1=axs[0] #first axis (left one)
ax2=axs[1] #second axis (right one)

ax1.plot(x,y1,color='r',label='left axis')
ax1.legend()

ax2.plot(x,y2,color='b',label='right axis')
ax2.legend()
[5]:
<matplotlib.legend.Legend at 0x115a6d198>

As you can see above, it is as easy as defining on which axis you like to plot, and then everything is similar to single plots (almost everything, you see later on why). Now Let’s have more subplots:
[6]:
fig,axs=plt.subplots(2,2,figsize=(15,3))

ax11=axs[0][0] # Top left
ax12=axs[0][1] # Top right
ax21=axs[1][0] # Bottom left
ax22=axs[1][1] # Bottom right

ax11.plot(x,y1,color='r',label='Top left')
ax11.legend()
ax11.set_ylabel('ylabel of top left plot')

ax12.plot(x,y2,color='b',label='Top right')
ax12.legend()


ax21.plot(x,y1,color='r',linestyle='--',label='Bottom left')
ax21.legend()

ax22.plot(x,y2,color='b',linestyle='--',label='Bottom right')
ax22.legend()
ax22.set_xlabel('xlabel of bottom right plot')
[6]:
Text(0.5, 0, 'xlabel of bottom right plot')

Important note:
As you can see, in contrast to single plots, when you are trying to set a property for the plot, you use set_{keyword}.
For example:
in single plot: plt.xlabel('your xlabel')
in subplots plot: ax.set_xlabel('your xlabel')
If you look at the plot above, you can see that the subplots are positioned very intensly. To fix this, we use the following command: plt.tight_layout()
[7]:
fig,axs=plt.subplots(2,2,figsize=(15,3))
plt.tight_layout()

ax11=axs[0][0] # Top left
ax12=axs[0][1] # Top right
ax21=axs[1][0] # Bottom left
ax22=axs[1][1] # Bottom right

ax11.plot(x,y1,color='r',label='Top left')
ax11.legend()
ax11.set_ylabel('ylabel of top left plot')

ax12.plot(x,y2,color='b',label='Top right')
ax12.legend()


ax21.plot(x,y1,color='r',linestyle='--',label='Bottom left')
ax21.legend()

ax22.plot(x,y2,color='b',linestyle='--',label='Bottom right')
ax22.legend()
ax22.set_xlabel('xlabel of bottom right plot')
[7]:
Text(0.5, 6.000000000000025, 'xlabel of bottom right plot')

To adjust the distance between the subplots, you should use: fig.subplots_adjust(hspace=)
For example:
[8]:
fig,axs=plt.subplots(2,2,figsize=(15,3))
fig.subplots_adjust(hspace=2)

ax11=axs[0][0] # Top left
ax12=axs[0][1] # Top right
ax21=axs[1][0] # Bottom left
ax22=axs[1][1] # Bottom right

ax11.plot(x,y1,color='r',label='Top left')
ax11.legend()
ax11.set_ylabel('ylabel of top left plot')

ax12.plot(x,y2,color='b',label='Top right')
ax12.legend()


ax21.plot(x,y1,color='r',linestyle='--',label='Bottom left')
ax21.legend()

ax22.plot(x,y2,color='b',linestyle='--',label='Bottom right')
ax22.legend()
ax22.set_xlabel('xlabel of bottom right plot')
[8]:
Text(0.5, 0, 'xlabel of bottom right plot')

You can change the position of legend using the keyword loc=. Possible values for this keyword:
best
upper right
upper left
lower left
lower right
right
center left
center right
lower center
upper center
center
[9]:
fig,axs=plt.subplots(1,1,figsize=(15,3))
axs.plot(x,y1,color='r',label='Top left')
axs.legend(loc='lower left',fontsize=16)
[9]:
<matplotlib.legend.Legend at 0x11a22a3c8>

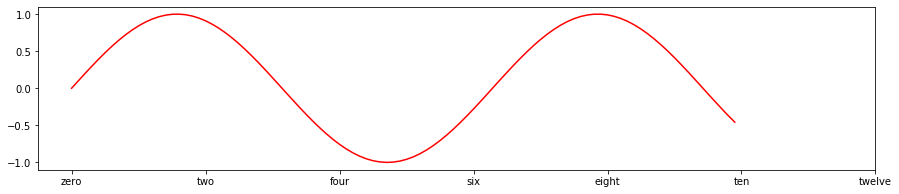
You can have costume x or y ticks using the following method:
[10]:
fig,axs=plt.subplots(1,1,figsize=(15,3))
axs.plot(x,y1,color='r')
axs.set_xticks([0,2,4,6,8,10,12])

axs.set_xticklabels(['zero','two','four','six','eight','ten','twelve'])
[10]:
[Text(0, 0, 'zero'),
 Text(0, 0, 'two'),
 Text(0, 0, 'four'),
 Text(0, 0, 'six'),
 Text(0, 0, 'eight'),
 Text(0, 0, 'ten'),
 Text(0, 0, 'twelve')]